Pages

Tuesday, March 30, 2010

Tuesday Tutorial: Vintage Easter Eggs

Tutorial prepared by The Collage Contessa.
Reprinted from Collage Contessa with permission.


Kris, the CollageContessa, has caught the tutorial bug! Finding, documenting a project as she goes, an addictive pass time. She's back this week to take us step-by-step through making a lovely Spring art piece just in time for Easter sharing. [Don't want to wait and make your own? Kris has put her Vintage Easter Eggs in her shop just for you!]

I started with mat board - one of my 'best ever' garage sale purchases, 2 huge Rubbermaid tubs full of mat board pieces for $4. I know DH wondered what in the world I was going to do with all of that but I've used it for years now and it shows no sign of depleting! Anyway, cut 4 egg shapes. Mine are about 3 1/4" x 4 3/4". I used an X-acto knife for this. It's the easiest way.

Cover the front of all the eggs with various scraps of dictionary paper, vintage sheet music, receipts, foreign text book pages and more. The usual vintage supplies. If you want, at this stage you could ink the edges with a brown ink pad.

Here's where the fun part comes in. Do you have cheesecloth in white? I have tons of this stuff. I must have kept buying it, thinking I didn't have any and voila! Now I have 5 packages. lol Anyway, take the folded pack, unfold a bit. Find the edge and cutting through all layers, cut off about 1" wide strip. Doesn't have to be perfect.

Take the cut piece, open up until you have a pile of strips. Set your sewing machine on little stitches and push the cheesecloth through the sewing machine with 2 fingers. Cheesecloth is dainty so it kind of takes 2 fingers to direct it. If you get a good rhythm of pushing through you'll get lots of ruffling happening. I thought about doing the ruffling the traditional way of big stitches and then pulling the threads tight to ruffle but knowing cheesecloth, it would have just ripped holes in the cloth.

When you're done and have a nice long strand (I cut two 1" strips and sewed them together), lay the strand out on scrap paper. Spray with watered down acrylic paint or glimmer mist. I made some of my own glimmer mist; I'll share that recipe sometime. I flipped the strands over to make sure color was on both sides.

Hang it up to dry somewhere. I did hit it with my heat gun for just a bit before hanging. It does make the cheesecloth shrink up in some spots so if you don't want that, don't heat it.

At this point I just took my egg shapes and added bits of lace, trim, ric rac, lines made with watercolor crayons (Caran d'ache), black pen and glitter glue. I glued on flowers, and pearls. I also adhered images from Altered Pages collage sheets. You can buy an Easter Egg kit now from the Altered Pages store.

When the cheesecloth trim was dry I glued it around a couple of the eggs and across the others in a stripe. You can also ink the cheesecloth with brown ink for a vintage look. On one egg I sewed the image to a fabric scrap. Just lots of little touches.

The last step I did was make a makeshift stand for my egg. I'm going to work on making something more permanent as this one is taped to the back but I like it right now. The egg looks so cute standing up. Wouldn't this make a great Easter gift? A few of the eggs are heading to my Etsy Store today.

For the stand, I took an 8-9" piece of wrapped wire. I rolled up the ends of the wire, leaving about 5-6" of unrolled wire in between. I formed it into a square U shape. I then took a 3" piece of wire and twisted it to the arms of the stand to brace it. I taped it to the back of the egg to help it stand up.


You can find Kris's altered mixed media pieces in her Etsy shop. Love Kris's whimsical style? She has an Etsy shop just for supplies!

Monday, March 22, 2010

5 Super Cheap Things to help Brand Your Small Arts and Crafts Business and Make it Look Big!

Originally posted on thefunkyfelter.com, re-posted with permission.

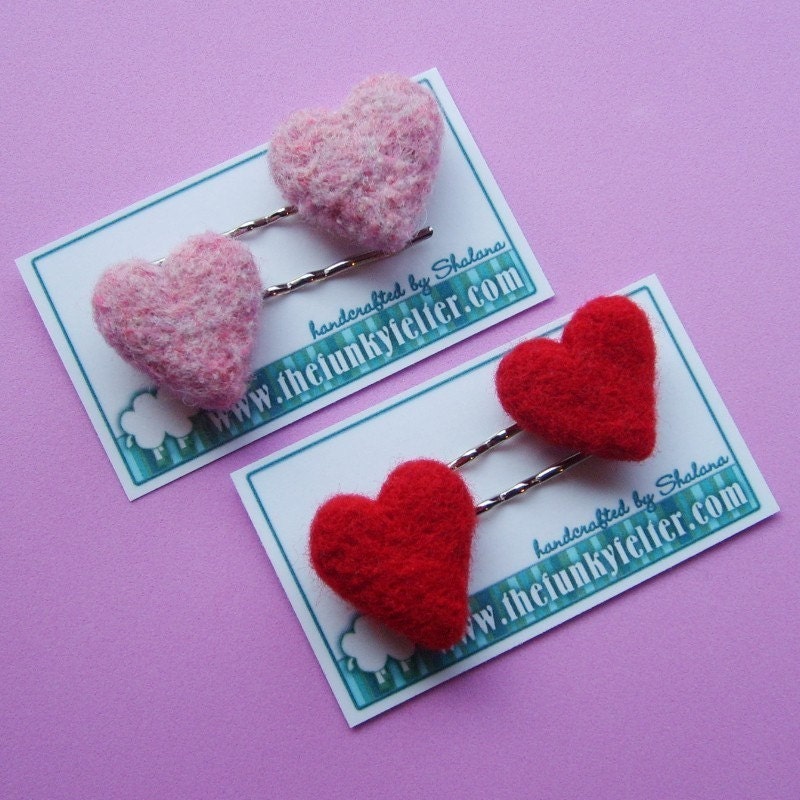
Shalana's beautiful felted wool creations can be found in her etsy shop or on her website.

At one point in time (seemingly eons ago now), I was an actual graphic designer. I must admit that has helped me tremendously with developing an online arts and crafts business. I can make all my own graphics, packaging, and other branding materials. You don't have to be a graphic designer though or even dabble in it that much to make your small indie business look very professional and run with the big boys. Over the years, I have learned some very inexpensive ways to put up a good front and make my business look professional on a budget. I thought that I'd share my top five cheap things with you. I hope you find it helpful. (FYI - Most of these tips assume that you have a computer and printer and a basic level skill at using them.)

Brand Yourself on a Budget!

  1. GET A LOGO. You need to have one consistent name and/or image (even if it is just your name in fancy lettering) to represent your business. This can seem daunting I know if you aren't that computer savvy. Well, my advice is... if you aren't a graphic designer or up on the latest graphic software, hire someone to make it for you. You might be thinking "Isn't that a load of cash to have done?" The answer is.... NO! Check on Etsy, ArtFire, and other handmade type websites for some great deals on logo design. There are some talented designers offering their services very cheaply on the side at these places. Take advantage of it if you need to. And, if you aren't a designer, please don't try to whip one up for yourself. A bad logo image can do more harm for your brand than you probably realize. Do what you do best and pay a little to have others do the rest. Trust me on this one. It is worth it!

  2. GET PACKAGED! If you are an online business, you still need to represent your product well with its packaging and labeling. You also need to be somewhat consistent in colors and style. Here's some cheap ideas to get you started... Buy a pre-made stamp(s) or have a custom stamp(s) made with your logo on it to use for making hang tags, clothing labels, return address labels, stickers, bookmarks, etc., etc., etc., The possibilities with a stamp are really endless. (Click here for a post on custom stamps and branding.) I also offer tagging and labeling stamps in my new Etsy shop. Another option is to once again check out Etsy, ArtFire, or another handmade type website for some great deals on tags and paper goods for packaging. Your local hobby shop also carries great paper goods as well as decorative scissors and paper punches to make your own tags and labels. If you are a little computer savvy, you can easily use it to print some labels to cut out. Then, of course, you can always make your business cards do double duty by punching a hole in the corner and attaching it to your items with a cute ribbon. That brings me to my third point...

  3. GET SOME BUSINESS CARDS! There are several places online that offer a dandy little tool to help you design your own business cards quickly and easily. I personally like OvernightPrints and have used their services for a couple of years now and always been satisfied. I highly recommend signing up for their promotional emails too. It is totally worth getting a little spam for the great deals that they offer on a regular basis. You can often get a discount or 100 business cards for free with their promos. Another option is to have a business card size custom stamp made. You can simply stamp several new cards at once when you run low. Finally, if you are a little computer savvy, you can print your own business card designs on card stock paper. Be careful doing this though because they can look cheap and be flimsy, and you don't want your business represented as cheap. You just want to be cheap with your business budget.

  4. GET A DOMAIN NAME! To this one, I know that you might say "Yikes!" because it seems a bit advanced and costly, but it really isn't. You have options for this that are inexpensive and don't require any graphic design skills on your part. First of all, it can be as cheap as $5 per year to register your domain business domain name. I highly recommend that you visit a site like GoDaddy or another registry site and pay the small registry fee to at least own your own domain. If you don't buy it someone else will eventually! This actually happened to me with the domain name "funkyfelter" when a real shister bought the name and emailed me relentlessly to purchase it for an outrageous amount of money. Fortunately, I like my current domain name ("thefunkyfelter") and did not need to own the other one. It is a good lesson to learn though so purchase your domain business name, or something similar to it if it is taken, for future use. Your own domain name also gives you credibility as well as allows you to be found more easily when searched for online. Now on to the website...

  5. GET A WEBSITE! This is the part that may really blow your mind. Take a deep breath! It is really not that complicated. You have a few options, some of which are even free. First of all, you can use your existing domain name to point to another location like your blog or your Etsy shop. If you plan to open up any other shops, like an ArtFire shop or etc., I don't recommend pointing the domain directly to your shop. A blog is a good alternative though. You can register one for free at blogger and other places. You can also easily design and modify your blog with side bar content and article posts. You can have links to all your other online shops and networking like Twitter and Facebook Fan pages. A blog can be a good home base that costs you nothing. Another upside to having a blog is that they are highly indexed by Google searches (especially blogger which is part of Google) and, therefore, you will be more easily found by others searching online. This is especially true for those who post regularly and use their titles and label keywords well. Another cheap option to a blog is a one page website that can be used as a home base. You will probably need to pay a little more with your domain registry though for actual web hosting if you go this route. If you check (um, you guessed it!) Etsy, ArtFire, or another handmade type site, you can find one page web designs for fairly inexpensive to purchase considering what an ad agency or freelance professional would charge you. If you go this route, do ask for references or examples of their work if they don't have it readily available. Also, ask them if they know about "SEO" and how to optimize your site so it is found easily in searches. Depending on what domain register you used, sometimes they offer free design templates for one page websites with your registry; therefore, you wouldn't necessarily have to pay for web hosting. And, although I am not very familiar with them, there are some free online design templates available if you search for them. I think that these would require some computer knowledge though as well as some design instincts to make them look professional and appealing. Unfortunately, I have seen arts and crafts websites that used free templates, and it has not enhanced their brand. Quite the opposite! So be picky about going that route.
There you have it. From several years of selling online, these are the basic things I recommend to get you started when you are also considering a tight budget and developing your brand. (A tight budget is usually all that I have to work with anyway!) I also recommend doing steps 1 - 5 as closely together as possible. If you do one little thing at a time, then decide to revamp your brand later on, it can be time consuming, costly, and difficult to transition. Think ahead and know how you'd like your small arts and crafts business to represent itself to the public. As an aside, there is one more thing that is totally free and invaluable in developing your brand. Time. If you are serious about making your small indie business self-supporting, you must be willing to spend quality time on it daily.

The Funky Felters funky felt creations and her new line of rubber stamps and cards can be found on Etsy. For great news and information about felted wool and an insider view on what Shalana is working on follow The Funky Felters blog and facebook fan page.

Friday, March 19, 2010

Hello Spring!

If you are ready to say good bye to winter let me hear you say "OH YEAH!"
If you are ready to say hello to spring let me hear you say "FOR SURE!"

The Gypsies are too, so come celebrate the return of the sun with us at Gypsy Emporium.

Gypsy Emporium is a multi faceted event designed to bring together artists, musicians, dancers, dreamers, shoppers and eaters for one fun filled, life affirming day of good times. This event is free to attend and open to the public, so please bring your drums or hoops, invite friends and bring the family along! There will definitely be something for everyone.

KCEtsy Team Members, HarvestofPeace (organizer), glazedearth, SkiDoodle, ExcessoriesKC, DumbKidDesigns, Thyme2dream, deannaburasco, upcycledjewelry, StirDesigns along with many other local artists will have a wide variety of great art available for purchase.

There will be live music throughout the event, special activities for the kids and young at heart, including face painting, hair wraps and henna tattoos. And if you're getting married soon, Gypsy Emporium will feature local wedding and event service providers who can help make your day special.

Stage Schedule:
10am Native American Flute with Cary Gilmore
10:30 Ziggy Hoop Dancer
11:30 Asteroid Advocate
12:30 Livella Brothers Jam
2pm Fashion Show
2:30 Rain Barrel drawing
2:30-4pm Open Drum circle and hoop party

Kansas City's Gypsy Emporium Spring Equinox Celebration
, will be at the Madrid Theater, 3810 Main Kansas City, MO 64111, Saturday March 20th from 10am - 4pm. Admission is FREE and open to the public so bring the family and help us welcome spring the GYPSY WAY!

Wednesday, March 17, 2010

Wishin' you a bit of Irish Luck

on St. Patty's Day!


Lothlorien Spring Forest Earcuff, by Thyme2dream
Limon Hand Knit Scarf by Stir Designs
Celtic Wallet by DumbKidDesigns
Olive Green Bowl by Glazed Earth


These KCEtsy artists and others will be selling their handcrafted items at the Gypsy Emporium Spring Equinox Celebration this Saturday, March 20th at the Madrid Theater in downtown Kansas City from 10am -4pm. For a complete list of participating artists and the days events, please visit their website.

Tuesday, March 16, 2010

Tuesday Tutorial: Butterfly WallFlower

This week's tutorial is done by Kris of CollageContessa. Kris is an experimental artist who loves to use lots of different mediums and techniques - collage, painting, fabric, stamps, paper, metal, ephemera and anything else I can get my hands on to create one of a kind altered art. In this tutorial we get to watch Kris as she experiments and plays with this pile of beautiful papers and makes a wallflower to welcome spring.

* * * * *

Just for fun I thought I'd try to take pictures while creating something from scratch. You never know what you might make or where the creativity will lead you. Sometimes the work sucks! But this time I enjoyed what I made. Perfect for spring. (All images used in this project are from Altered Pages. See the kit section.)

1. If you're like me and hate to waste anything, you'll understand why all my extra paint on a palette ends up randomly swiped on scrap papers. This way I have a stack of them to use in future projects. Using scraps or painted papers like these, cut out leaf or petal shapes.

2. I even used lace scraps. Next, lay them out on a piece of paper and using india or other watery ink to draw all over them with the dropper or a calligraphy pen set.


3. Take a scrap of felt or fabric and cut 3 circles: 3 1/4", 2 1/4" and 2". Lining the petals around the largest circle, zigzag sew the petals to the felt.


4. Do this again with the medium circle. After both are complete, take strips of a dictionary page and layer them in a circle on top of the middle circle. Layer this sandwich on top of the large circle and sew through all layers.

5. Take the small circle and layer with a transparent image. Here I used a transparent Altered Pages butterfly. Sew 4 even lines (in pie sections) through the small circle and image. Then, take butterfly circle, lay on top of the sandwiched flower piece circles and sew around the edge of the small circle to connect the layers perfectly.

6. Turn over the whole piece and handstitch a length of sheer ribbon to the back as a hanger for your new flower!


This is a perfect little decoration to hang on your door to welcome spring.

With some of the leftover petals and images, I created a pretty card that says 'believe' written with the calligraphy pen.


I also made a few little cards that can be given away as a gift card set or used to sent little notes to friends. I then tied them up in a bundle with butcher's thread.

All these items can be found in Kris's
Etsy Shop. You can purchase a kit of the images used in this project from Altered Pages in their kit shop. Have fun creating! I'd love to see if you make this, using the tutorial.

Learn more about Kris and her creative process on her blog - Collage Contessa

Friday, March 5, 2010

Friday Finds: Art Show and Demonstrations

Local artists from across the Kansas City area will be on hand at the Buttonwood Art Space (3013 Main Street, Kansas City, MO 64108) tomorrow, Saturday, March 6th from 10am - 5pm for their the New Beginnings Art Show Open House. Artists will present live "PAINT-IN" demonstrations in mediums of oil, acrylic, pastels, and watercolor. Gary Ozias, Donna Aldridge and Rich Hayek are among the artists demonstrating. Light refreshments will be served. The New Beginnings exhibition closes on Friday, March 26th.


For more details about the show, artist profiles and a listing of the art included, please visit ButtonwoodArtSpace.com.

Tuesday, March 2, 2010

Tuesday Tutorial: 3T Apron Skirt

Our newest tutorial comes from KCEtsy Team Member and sewer, Lori Rio of ditda.etsy.com. Her apron skirt is a quick, fun project to make for a little girl in your life. Perfect for Spring.

Lori says,"I love the way the apron gives another dimension to this skirt. It is such an adorable look and it is so easy to make you’ll want to make one for every little girl you know!"


All seams are 1/4". Measurements are in inches.


First, cut out your pattern pieces:
Cut 2 for Main skirt: 18” X 7.5” (contrast 1)
Cut 1 for Yolk: 12.5” X 5.5” (contrast 1)
Cut 2 for Hem: 18” X 7.5” (contrast 2)

Cut 1 for Apron piece: 14” X 9.5” (overall size) (contrast 3)
Cut overall size of apron if you do NOT want a contrasting band on the apron.

Cut the following pieces if you want a contrasting band on apron:
14” X 7” (contrast 3)
14” X 1.5” (contrast 2)
14” X 2” (contrast 3)

For the elastic, I used 3/4" X 18". You can also measure the waist of the child and add 1".

With right sides together, sew the 2 Main Skirt pieces together at the short end of the cut. Do this for both short ends. At this point you can either serge or finish the ends however you want.

Next, sew 2 Hem pieces together at the short end of the cut (same as the Main Skirt). You do not have to finish the edges on the Hem because we will be folding them in.

With right sides together, sew the short ends of the Yolk together.
Just like the Main Skirt, you can serge the end or finish it however you please.

Next, match the unfinished edges of the Hem, wrong sides together, and press. Be sure to match your seams. Do this around the entire Hem.

When finished, it should look like a giant headband that would fit Godzilla if Godzilla had hair…and was real.

Now for the Apron. If you do not want a contrasting band on the Apron, then go ahead and hem one of the 14” edges and the two adjacent sides.

If you chose a contrasting band then with right sides together, attach the 14” X 1.5” (contrast 2) band to the 14” X 7” (contrast 3) piece. Finish the edges (the part you just sewed) however you prefer and iron seam down. With right sides together attach the remaining 14” X 2” (contrast 3) Apron piece to the existing piece you just sewed together. Finish the edges however you prefer (again, the edges you just sewed) and be sure to iron your seams down. Top stitch both sides. Now hem the 14” side of the apron and the 2 adjacent sides.

With right sides together and matching seams, match the unfinished edge of your Hem with the unfinished edge of your Main Skirt. You can serge the two pieces together or finish it off however you prefer.

Once attached, top stitch the Main Skirt and Hem portion. Top stitching makes your piece look professional and finished.

Now for the fun part: ruffling. You can ruffle the skirt however you please. I actually have a ruffler foot. Have I used it? Don't be silly, I've had it for 4 months and still have no clue as to its uses, so I ruffle the way I’ve always known to: gather stitch the top portion of the Main Skirt piece and pull the thread to gather. I usually gather stitch each side separately. This enables me to evenly distribute one side instead of an entire skirt at a time.

With right sides together, attach the Apron to the Yolk of the skirt, 1" from the the Yolk seams. You will need to lightly pleat it.

Now with right sides together, attach the ruffled skirt to the Yolk making sure that the ruffles are evenly distributed (you wouldn't want a left-heavy skirt, would you?) and stitch, finishing off the edges in what ever manner you fancy.

Once the skirt is attached to the yolk, do I really need to tell you to top stitch? Nah, you know.

Fold in a 1/4" on the top, unfinished side of the yolk. Press, then fold over again to accommodate whichever size of elastic you are using. I used a 3/4" elastic so I folded the fabric over just at 1". Stitch all around leaving a 1" opening to insert the elastic. The easiest way I found was to attach a safety pin to the end of the elastic and pull it through.

Once through, zigzag stitch the elastic ends together and close off the entry.
Now sit back and marvel at the pretty skirt you just made!

Thanks Lori for a great project! As always when you try one of our team members tutorials, we'd love it if you come back and share a picture!

Find Lori specializes in purses, tote bags, and children's clothing. You can find her on Etsy and keep up with her on facebook, twitter and her blog.