Showing posts with label tutorial. Show all posts

Wednesday, February 22, 2012

Tutorial Tuesday - Shoulder Heat Pillow tutorial

Nicole at Ni-Chern Designs created a Shoulder Heat Pillow tutorial on her blog.

-----

Here are the supplies that you need:
1/2 yard of fabric (cotton, flannel, etc - any would work)
~ 10 1/2 cups of flax seeds (or buckwheat or rice)
~ 7 tablespoons of dried lavender (or dried chamomile) -- this is optional

Go here to get the pattern that I drew out. It should fit on two 8.5 x 11 sheets. You'll see two dashes on page 2, that's where the first page should line up with the second page.

Step 1: Cut 2 pieces from the pattern from the 1/2 yard of fabric

Here I used Flower Bed Blush from Art Gallery Fabrics' Coquette collection


Step 2: Line up the two pieces with right sides together and sew all the way around until you get to one side of the C-shape.
Leave about 2 1/2" inches open on one end.


Step 3: Turn the right side out. I would mix 1 1/2 cup with 1 tablespoon of dried lavender.


Step 4: Pour the 1 1/2 cup in the C-shape, then I'd pin the flax fabric to keep the flax seeds in place. It helps to have a funnel.


Step 5: Stitch the along the pins, you want the flax seeds to have some room so it's not so bulky and it would sit on your shoulder better than a big chunk of seeds in one spot. In the picture below, I had the pins pretty close to the flax seeds, then I'd stitch to where the foot would barely touch the pins giving the flax seeds room after it's stitched.


Step 6: After your last flax seed fill for the pillow, close the 2.5" opening by turning a little bit of the opening fabric in.

That's it! Heat it up in the microwave or put it in the freezer. Don't just leave it in your microwave and walk off! Heat it 15-20 seconds to see if that's the warmth you like... and repeat if you want it warmer. It may be too hot to handle if you toss it in for too long! And I don't want anything to happen to you if that happens!


-----

Now here are some things that I did that you may or may not want to do.
Because flax seeds look like bugs, and I'm not a fan of bugs. If I see one, I'm spraying the house or calling the exterminator!

So, I zig-zag after stitching in Step 2 in case any flax seeds decides to escape, and I freak out because it looks like a bug! You could probably see the zig-zag stitching in the picture. This is totally up to you, you can go back and stitch zig zag if you want.

If you do not want to worry about the pins on keeping the flax seeds in place and stitch 7 times and just leave the flax seeds loose, you can. I did it because it keeps the flax seeds where you want it, it evenly distributes the heat on your shoulders. That is also optional.

Make this for you and what works best for you!

Let me know how it goes! :)

Wednesday, December 21, 2011

Holiday bows tutorial

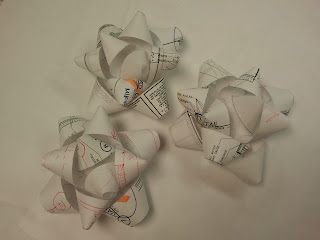
Nicole from Ni-Chern Designs posted a Holiday bows tutorial that is super easy to make!

Check it out!

Four days before Christmas! I'm sure everyone is starting to wrap their presents! BUT you forgot to buy bows! Oh No!!! No worries... take a deep breath. Do you have 5 - 8 minutes to spare? Yes? Well! This bow making tutorial is just for you!
I made some bows with some blueprints from work.


They are super easy to make!
If you have scrap paper that you don't really want to throw away or even your child's scribbles... or progress reports from work, or notes from your teacher to your parents, ... any paper would be perfect to use for this simple project!


Cut stripes. I had cut 3/4" and 1" strips.
11" is too long, so trim it down to about 9" or 9.5"
Fold the strip in half.  Twist one end of the paper to the folded line. Tape the one side down. I used tape, but you can use glue if you want to. Do the same thing to the other side of the strip. Twist two of the 9" strips like this. Tape them crossed on top of each other. I'm not sure if you can see it well in the pictures below.


For the next three strips, cut them at 7". Do the same thing, and tape them to the base of the bow that you started with the 9" strips.


I think 5 strips look the best (bow to the left) than the 4 strips (bow to the right). You can vary the width of the bows to your liking... but now you know how to make them!!


(Reposted from Nicole's Blog)

Monday, June 20, 2011

Tutorial:: Travel/Toddler Pillow Cover

Are you planning a road trip this summer? If so, a pillow is an essential traveling companion, but pillows take up a ton of space! Travel or toddler pillows are a great traveling alternative to standard pillows. They are about half the size and just as comfortable for use in the car.

Nicole of Ni-Chern Designs recently shared a tutorial on her blog, for making a toddler pillow cover. Pillow covers are like pillowcases only instead of having an opening on the end, the opening is in the back of the pillow, and it typically over laps by a few inches to keep the pillow form securely inside the cover. For kid and for traveling, pillow covers make it easy to identify whose pillow is who's and they can be quickly and easily laundered whenever the need arises - very helpful with traveling with little ones.

Nicole's step-by-step instructions can be found here. Good luck! And when you're finished, post pictures of your pillows on the Ni-Chern Deisngs Facebook page!

Friday, April 29, 2011

Sweet and Salty

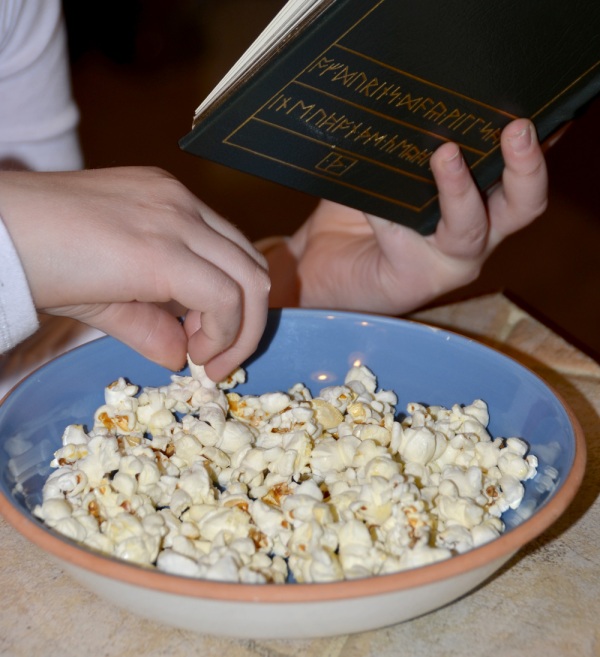
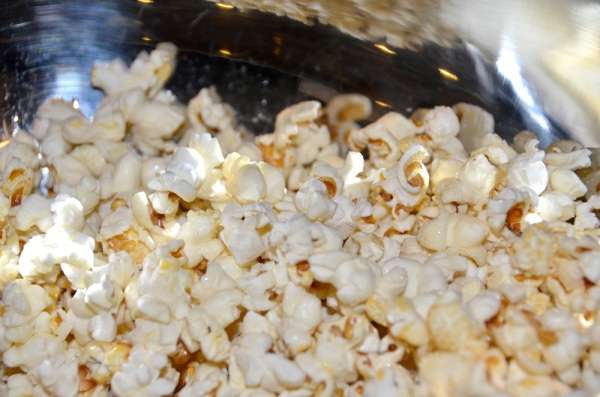
Earlier this week the kids wanted an after school snack and begged for popcorn … Uncle’s popcorn, homemade kettle corn. Something he has been experimenting with and recently gave me a quick how-to lesson. I gave it a whirl, my first solo attempt, and it worked! Ha, it worked! Warm, crunchy, sweet and salty goodness.

So yummy! I love the slightly sweet taste you get along side the lightly salted popcorn. And that it comes from my kitchen, off my stove, and not from a commercial bag out of my microwave, makes it that much better.

Here’s how to make it.

You’ll need:

a large, tall lidded stock pot
3T oil
1/4 cup unpopped popcorn
1 T sugar
salt
1 large bowl

Heat oil in pot, adding 6 or so test kernels of popcorn to the pot. Put lid on the pot. I start my heat at about a 5 (medium low heat) and after the first batch turn my head down lower, but my stove top seems hotter than most, and also holds it’s heat, so be careful, you don’t want your heat to be too high or everything will be a black mess in a couple of minutes.

Once your test kernels pop – you’ll hear it don’t worry! – add 1/4 cup popcorn kernels, give the pot a little side to side shake so the kernels are in a single layer on the bottom of the pot, sitting in the layer of oil. Before putting the lid back on, quickly sprinkles 1T of sugar over the top of the kernels.

With the lid securely on, gently move the pot back and forth on the burner, not removing the pot from the burner, just swirling and shaking the pot back and forth on top of the burner to distribute the sugar and keep it moving so it doesn’t burn. Once kernels start popping, you can stop moving the pot. The instant the popping slows and stops, remove the pot from the stove and take off the lid. Make sure it isn’t burnt and dump popcorn into your serving bowl. Sprinkle with salt and toss to break up the little clumps of popcorn and distribute the salt. Watch for the occasional dud … an unpopped kernel, so no one breaks a tooth, and enjoy!

You don’t have to stop at one batch. For our family of seven, I make this batch three times. After you dump the popped corn into your serving bowl, wipe the pot out with a couple of paper towels. Removing all the excess oil and popcorn bits left behind. Put pot back on the stove top and repeat.

Want plain popcorn? Just leave out the sugar – and if you’re leaving out the sugar, a single shake of the kernels to get them in a single layer on the bottom of the pot is all the shaking you need to do.

FYI – I have a glass stove top, and my brother has had the most success with the glass stove top because the pot can glide across the surface of the heat very easily, but my mother has a very old, original to their house stove top and she was able to make this recipe work with a little less shaking and moving of the pot. Just know that the sugar can burn in an instant which is anything but yummy, so be careful.

Reposted with permission from tinystitches.wordpress.com.

Tuesday, March 30, 2010

Tuesday Tutorial: Vintage Easter Eggs

Tutorial prepared by The Collage Contessa.
Reprinted from Collage Contessa with permission.


Kris, the CollageContessa, has caught the tutorial bug! Finding, documenting a project as she goes, an addictive pass time. She's back this week to take us step-by-step through making a lovely Spring art piece just in time for Easter sharing. [Don't want to wait and make your own? Kris has put her Vintage Easter Eggs in her shop just for you!]

I started with mat board - one of my 'best ever' garage sale purchases, 2 huge Rubbermaid tubs full of mat board pieces for $4. I know DH wondered what in the world I was going to do with all of that but I've used it for years now and it shows no sign of depleting! Anyway, cut 4 egg shapes. Mine are about 3 1/4" x 4 3/4". I used an X-acto knife for this. It's the easiest way.

Cover the front of all the eggs with various scraps of dictionary paper, vintage sheet music, receipts, foreign text book pages and more. The usual vintage supplies. If you want, at this stage you could ink the edges with a brown ink pad.

Here's where the fun part comes in. Do you have cheesecloth in white? I have tons of this stuff. I must have kept buying it, thinking I didn't have any and voila! Now I have 5 packages. lol Anyway, take the folded pack, unfold a bit. Find the edge and cutting through all layers, cut off about 1" wide strip. Doesn't have to be perfect.

Take the cut piece, open up until you have a pile of strips. Set your sewing machine on little stitches and push the cheesecloth through the sewing machine with 2 fingers. Cheesecloth is dainty so it kind of takes 2 fingers to direct it. If you get a good rhythm of pushing through you'll get lots of ruffling happening. I thought about doing the ruffling the traditional way of big stitches and then pulling the threads tight to ruffle but knowing cheesecloth, it would have just ripped holes in the cloth.

When you're done and have a nice long strand (I cut two 1" strips and sewed them together), lay the strand out on scrap paper. Spray with watered down acrylic paint or glimmer mist. I made some of my own glimmer mist; I'll share that recipe sometime. I flipped the strands over to make sure color was on both sides.

Hang it up to dry somewhere. I did hit it with my heat gun for just a bit before hanging. It does make the cheesecloth shrink up in some spots so if you don't want that, don't heat it.

At this point I just took my egg shapes and added bits of lace, trim, ric rac, lines made with watercolor crayons (Caran d'ache), black pen and glitter glue. I glued on flowers, and pearls. I also adhered images from Altered Pages collage sheets. You can buy an Easter Egg kit now from the Altered Pages store.

When the cheesecloth trim was dry I glued it around a couple of the eggs and across the others in a stripe. You can also ink the cheesecloth with brown ink for a vintage look. On one egg I sewed the image to a fabric scrap. Just lots of little touches.

The last step I did was make a makeshift stand for my egg. I'm going to work on making something more permanent as this one is taped to the back but I like it right now. The egg looks so cute standing up. Wouldn't this make a great Easter gift? A few of the eggs are heading to my Etsy Store today.

For the stand, I took an 8-9" piece of wrapped wire. I rolled up the ends of the wire, leaving about 5-6" of unrolled wire in between. I formed it into a square U shape. I then took a 3" piece of wire and twisted it to the arms of the stand to brace it. I taped it to the back of the egg to help it stand up.


You can find Kris's altered mixed media pieces in her Etsy shop. Love Kris's whimsical style? She has an Etsy shop just for supplies!

Tuesday, March 16, 2010

Tuesday Tutorial: Butterfly WallFlower

This week's tutorial is done by Kris of CollageContessa. Kris is an experimental artist who loves to use lots of different mediums and techniques - collage, painting, fabric, stamps, paper, metal, ephemera and anything else I can get my hands on to create one of a kind altered art. In this tutorial we get to watch Kris as she experiments and plays with this pile of beautiful papers and makes a wallflower to welcome spring.

* * * * *

Just for fun I thought I'd try to take pictures while creating something from scratch. You never know what you might make or where the creativity will lead you. Sometimes the work sucks! But this time I enjoyed what I made. Perfect for spring. (All images used in this project are from Altered Pages. See the kit section.)

1. If you're like me and hate to waste anything, you'll understand why all my extra paint on a palette ends up randomly swiped on scrap papers. This way I have a stack of them to use in future projects. Using scraps or painted papers like these, cut out leaf or petal shapes.

2. I even used lace scraps. Next, lay them out on a piece of paper and using india or other watery ink to draw all over them with the dropper or a calligraphy pen set.


3. Take a scrap of felt or fabric and cut 3 circles: 3 1/4", 2 1/4" and 2". Lining the petals around the largest circle, zigzag sew the petals to the felt.


4. Do this again with the medium circle. After both are complete, take strips of a dictionary page and layer them in a circle on top of the middle circle. Layer this sandwich on top of the large circle and sew through all layers.

5. Take the small circle and layer with a transparent image. Here I used a transparent Altered Pages butterfly. Sew 4 even lines (in pie sections) through the small circle and image. Then, take butterfly circle, lay on top of the sandwiched flower piece circles and sew around the edge of the small circle to connect the layers perfectly.

6. Turn over the whole piece and handstitch a length of sheer ribbon to the back as a hanger for your new flower!


This is a perfect little decoration to hang on your door to welcome spring.

With some of the leftover petals and images, I created a pretty card that says 'believe' written with the calligraphy pen.


I also made a few little cards that can be given away as a gift card set or used to sent little notes to friends. I then tied them up in a bundle with butcher's thread.

All these items can be found in Kris's
Etsy Shop. You can purchase a kit of the images used in this project from Altered Pages in their kit shop. Have fun creating! I'd love to see if you make this, using the tutorial.

Learn more about Kris and her creative process on her blog - Collage Contessa

Tuesday, March 2, 2010

Tuesday Tutorial: 3T Apron Skirt

Our newest tutorial comes from KCEtsy Team Member and sewer, Lori Rio of ditda.etsy.com. Her apron skirt is a quick, fun project to make for a little girl in your life. Perfect for Spring.

Lori says,"I love the way the apron gives another dimension to this skirt. It is such an adorable look and it is so easy to make you’ll want to make one for every little girl you know!"


All seams are 1/4". Measurements are in inches.


First, cut out your pattern pieces:
Cut 2 for Main skirt: 18” X 7.5” (contrast 1)
Cut 1 for Yolk: 12.5” X 5.5” (contrast 1)
Cut 2 for Hem: 18” X 7.5” (contrast 2)

Cut 1 for Apron piece: 14” X 9.5” (overall size) (contrast 3)
Cut overall size of apron if you do NOT want a contrasting band on the apron.

Cut the following pieces if you want a contrasting band on apron:
14” X 7” (contrast 3)
14” X 1.5” (contrast 2)
14” X 2” (contrast 3)

For the elastic, I used 3/4" X 18". You can also measure the waist of the child and add 1".

With right sides together, sew the 2 Main Skirt pieces together at the short end of the cut. Do this for both short ends. At this point you can either serge or finish the ends however you want.

Next, sew 2 Hem pieces together at the short end of the cut (same as the Main Skirt). You do not have to finish the edges on the Hem because we will be folding them in.

With right sides together, sew the short ends of the Yolk together.
Just like the Main Skirt, you can serge the end or finish it however you please.

Next, match the unfinished edges of the Hem, wrong sides together, and press. Be sure to match your seams. Do this around the entire Hem.

When finished, it should look like a giant headband that would fit Godzilla if Godzilla had hair…and was real.

Now for the Apron. If you do not want a contrasting band on the Apron, then go ahead and hem one of the 14” edges and the two adjacent sides.

If you chose a contrasting band then with right sides together, attach the 14” X 1.5” (contrast 2) band to the 14” X 7” (contrast 3) piece. Finish the edges (the part you just sewed) however you prefer and iron seam down. With right sides together attach the remaining 14” X 2” (contrast 3) Apron piece to the existing piece you just sewed together. Finish the edges however you prefer (again, the edges you just sewed) and be sure to iron your seams down. Top stitch both sides. Now hem the 14” side of the apron and the 2 adjacent sides.

With right sides together and matching seams, match the unfinished edge of your Hem with the unfinished edge of your Main Skirt. You can serge the two pieces together or finish it off however you prefer.

Once attached, top stitch the Main Skirt and Hem portion. Top stitching makes your piece look professional and finished.

Now for the fun part: ruffling. You can ruffle the skirt however you please. I actually have a ruffler foot. Have I used it? Don't be silly, I've had it for 4 months and still have no clue as to its uses, so I ruffle the way I’ve always known to: gather stitch the top portion of the Main Skirt piece and pull the thread to gather. I usually gather stitch each side separately. This enables me to evenly distribute one side instead of an entire skirt at a time.

With right sides together, attach the Apron to the Yolk of the skirt, 1" from the the Yolk seams. You will need to lightly pleat it.

Now with right sides together, attach the ruffled skirt to the Yolk making sure that the ruffles are evenly distributed (you wouldn't want a left-heavy skirt, would you?) and stitch, finishing off the edges in what ever manner you fancy.

Once the skirt is attached to the yolk, do I really need to tell you to top stitch? Nah, you know.

Fold in a 1/4" on the top, unfinished side of the yolk. Press, then fold over again to accommodate whichever size of elastic you are using. I used a 3/4" elastic so I folded the fabric over just at 1". Stitch all around leaving a 1" opening to insert the elastic. The easiest way I found was to attach a safety pin to the end of the elastic and pull it through.

Once through, zigzag stitch the elastic ends together and close off the entry.
Now sit back and marvel at the pretty skirt you just made!

Thanks Lori for a great project! As always when you try one of our team members tutorials, we'd love it if you come back and share a picture!

Find Lori specializes in purses, tote bags, and children's clothing. You can find her on Etsy and keep up with her on facebook, twitter and her blog.